
CTA Banner
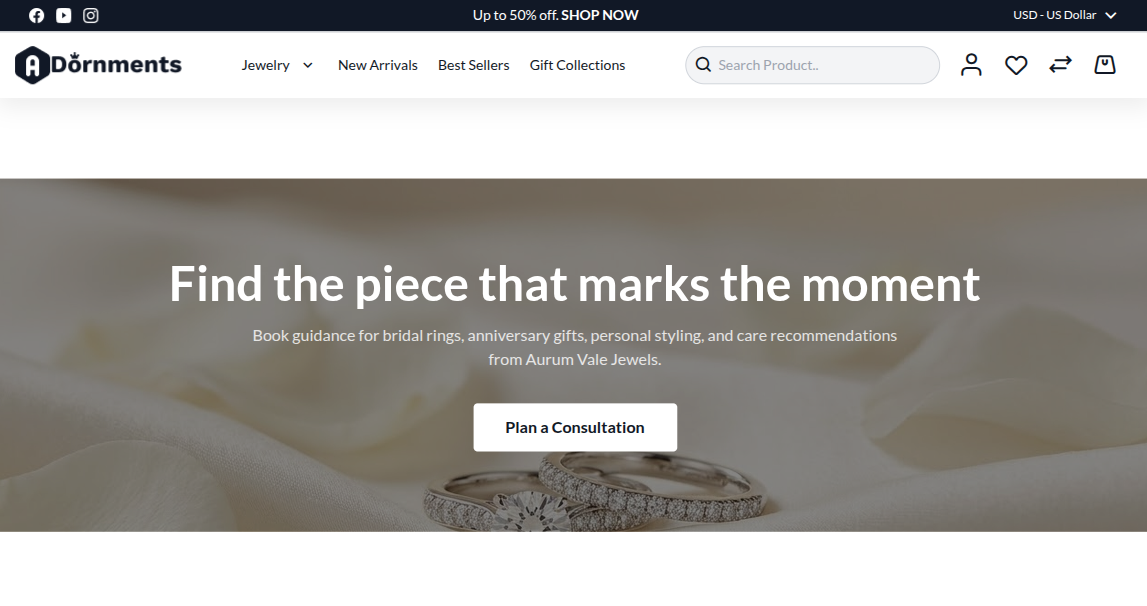
The CTA Banner section asks shoppers to take one clear action. Use it for booking an appointment, visiting a store, contacting support, or opening a special collection.
CTA means call to action.
Add a CTA Banner
- Go to Content -> Homepage Configurator -> Sections.
- Click Add New Section.
- Enter a Title, for example
Private Styling Appointment. - Set Section Type to CTA Banner.
- Set Enabled to Yes.
- Use a Sort Order so it appears in the right place on the homepage.
- Fill the CTA Banner Configuration fields.
- Click Save.
Main settings
| Setting | What it does |
|---|---|
| Background Image | Upload a wide image. Recommended size is 1920 x 600 px. Maximum file size is 4 MB. |
| Overlay Color | Color placed above the image. Example: rgba(0,0,0,0.45). |
| Heading | Main CTA text. |
| Subheading | Short text below the heading. |
| Button Label | Button text, such as Book Appointment. |
| Button URL | Link for the button. |
| Button Style | Choose Filled or Outline. |
| Text Alignment | Choose Left, Center, or Right. |
Storefront result
Good practice
- Use one action only.
- Use a darker overlay on bright images.
- Keep the button label short.
- Link the button to a real page, not
#.