
Promo Banner
The Promo Banner section highlights an offer, gift campaign, sale message, or featured edit. Use it when you want one campaign to stand out.
Add a Promo Banner
- Go to Content -> Homepage Configurator -> Sections.
- Click Add New Section.
- Enter a Title, for example
Premium Gift Edit. - Set Section Type to Promo Banner.
- Set Enabled to Yes.
- Use a Sort Order so it appears in the right place on the homepage.
- Fill the Promo Banner Configuration fields.
- Click Save.
Main settings
| Setting | What it does |
|---|---|
| Layout | Choose Image Grid or Full Width. |
| Small Heading | Small text above the main heading, such as Best Offer. |
| Large Heading | Main campaign text, such as Buy one, get 30% off. |
| Button Label | Button text, such as Shop Now. |
| Button URL | Link for the button. |
| Promo Images | Add one or more campaign images. |
Promo image fields
Click Add Image, then fill these fields.
| Field | What to enter |
|---|---|
| Promo Image | Upload the promo image. Maximum file size is 4 MB. |
| Link URL | Optional link when the image is clicked. |
Storefront result
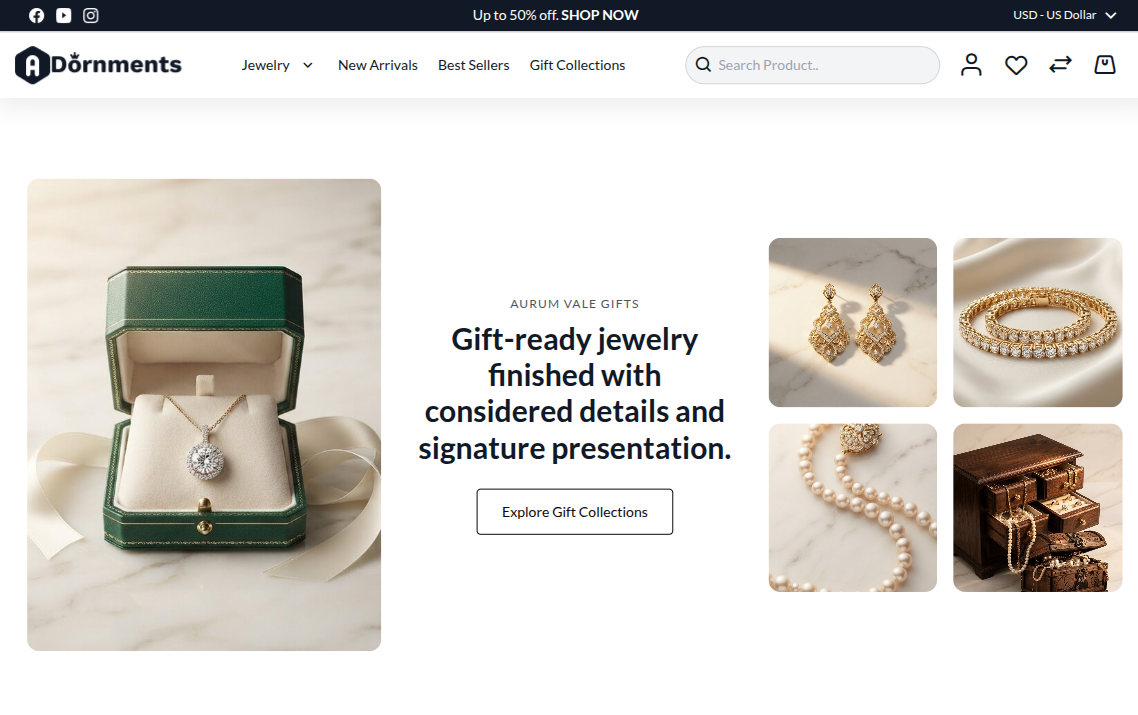
Good practice
- Use one offer per promo banner.
- Keep the main heading short.
- Add a clear button link.
- Disable old offers when the campaign is finished.